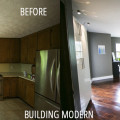
We have finished our Japanese-inspired DIY 2-Story Shed! We hope you enjoy the video!! 🙂


New House, New Videos!
Hey Everyone!
We’re so excited that you found our site!! We wanted to let you know that we’ve started making YouTube Videos again! We hope to see you there! We’re working on gardening, landscaping, and modern builds! We’ll be reviewing some of our older projects like a modern planter bed & modern primary bathroom renovation, as well as new projects!
We can’t wait to see you there! Please leave a comment and say hello on our YouTube Channel! Thanks!

Storefront windowsill repair
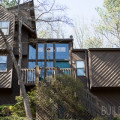
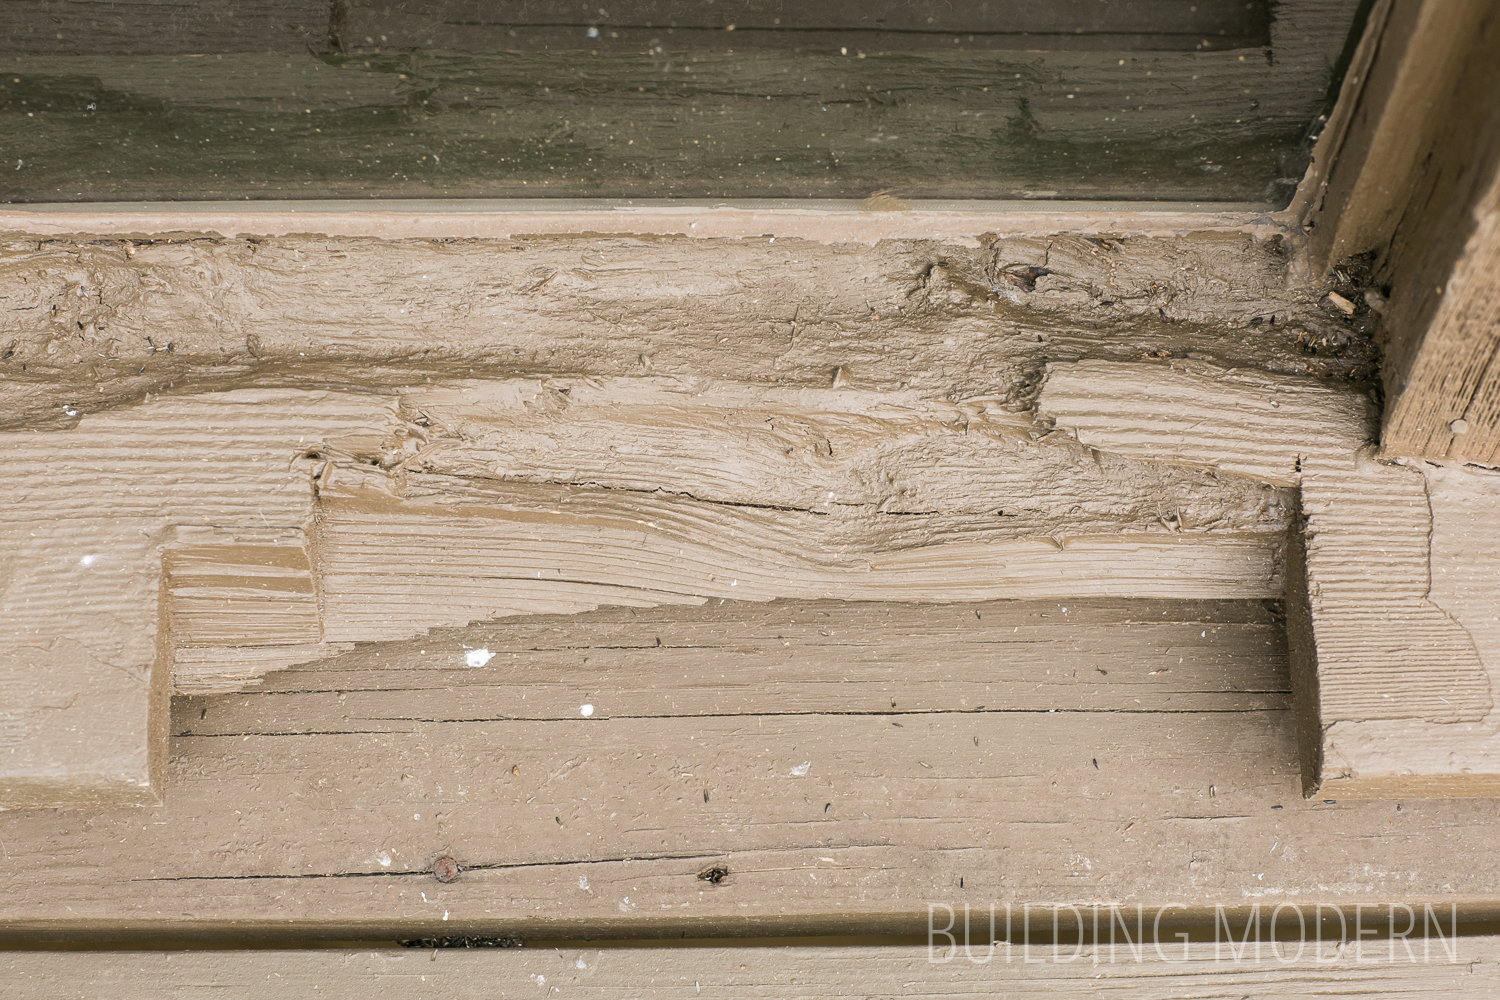
The front of our house has a rather unique feature: the foyer is a 12 ft. tall floor to ceiling cedar beam and glass wall. The glass had water penetration issues between the panes (the seals had broken) and were foggy and needed to be replaced. We scheduled a company to come and replace the glass, but first we needed to address some rotted areas at the bottom sill.

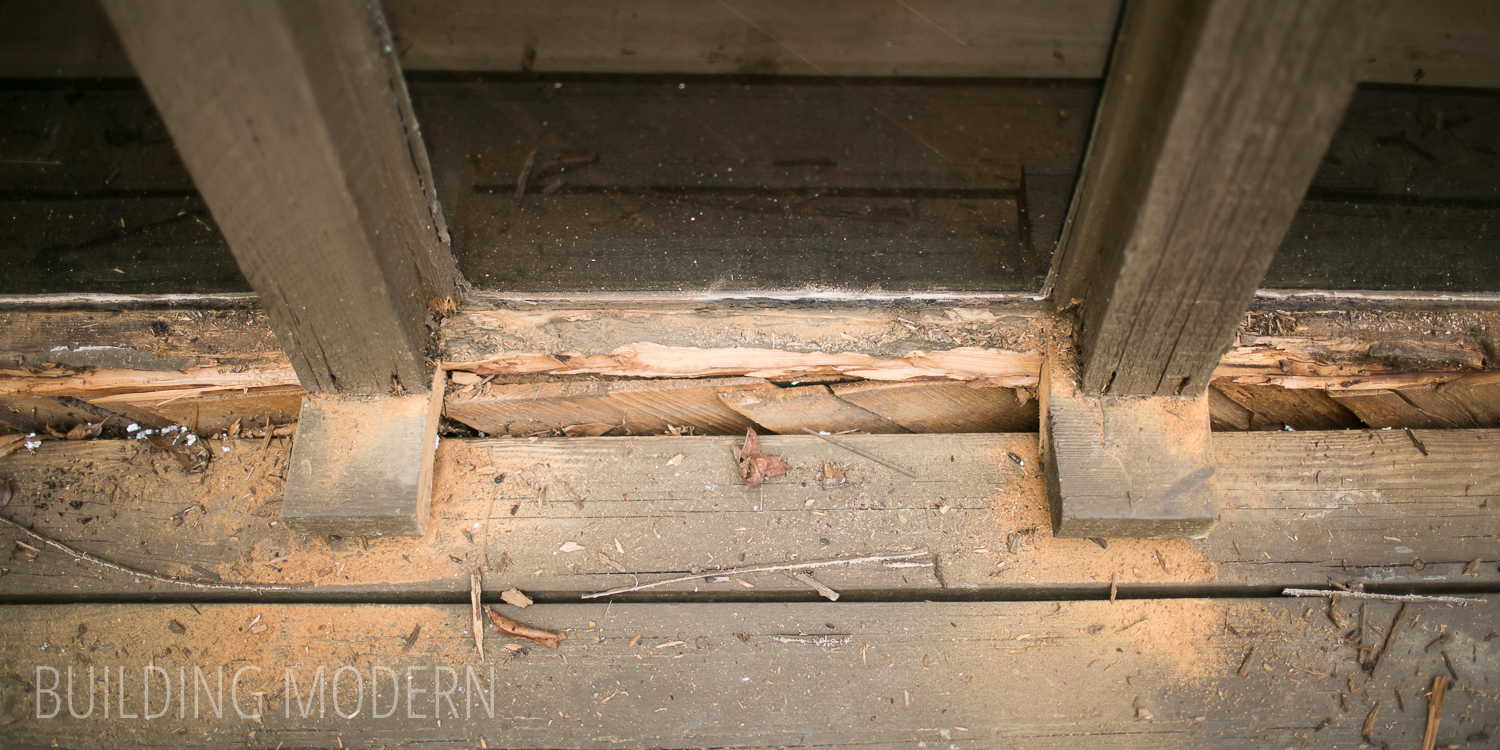
We had already dug out the rotted wood just to see how bad the damage was. (I had stained to area just to protect it in the meantime). All of the vertical beams and the bottom sill are pieces of wood that go beyond the glass and continue into the interior of the home.
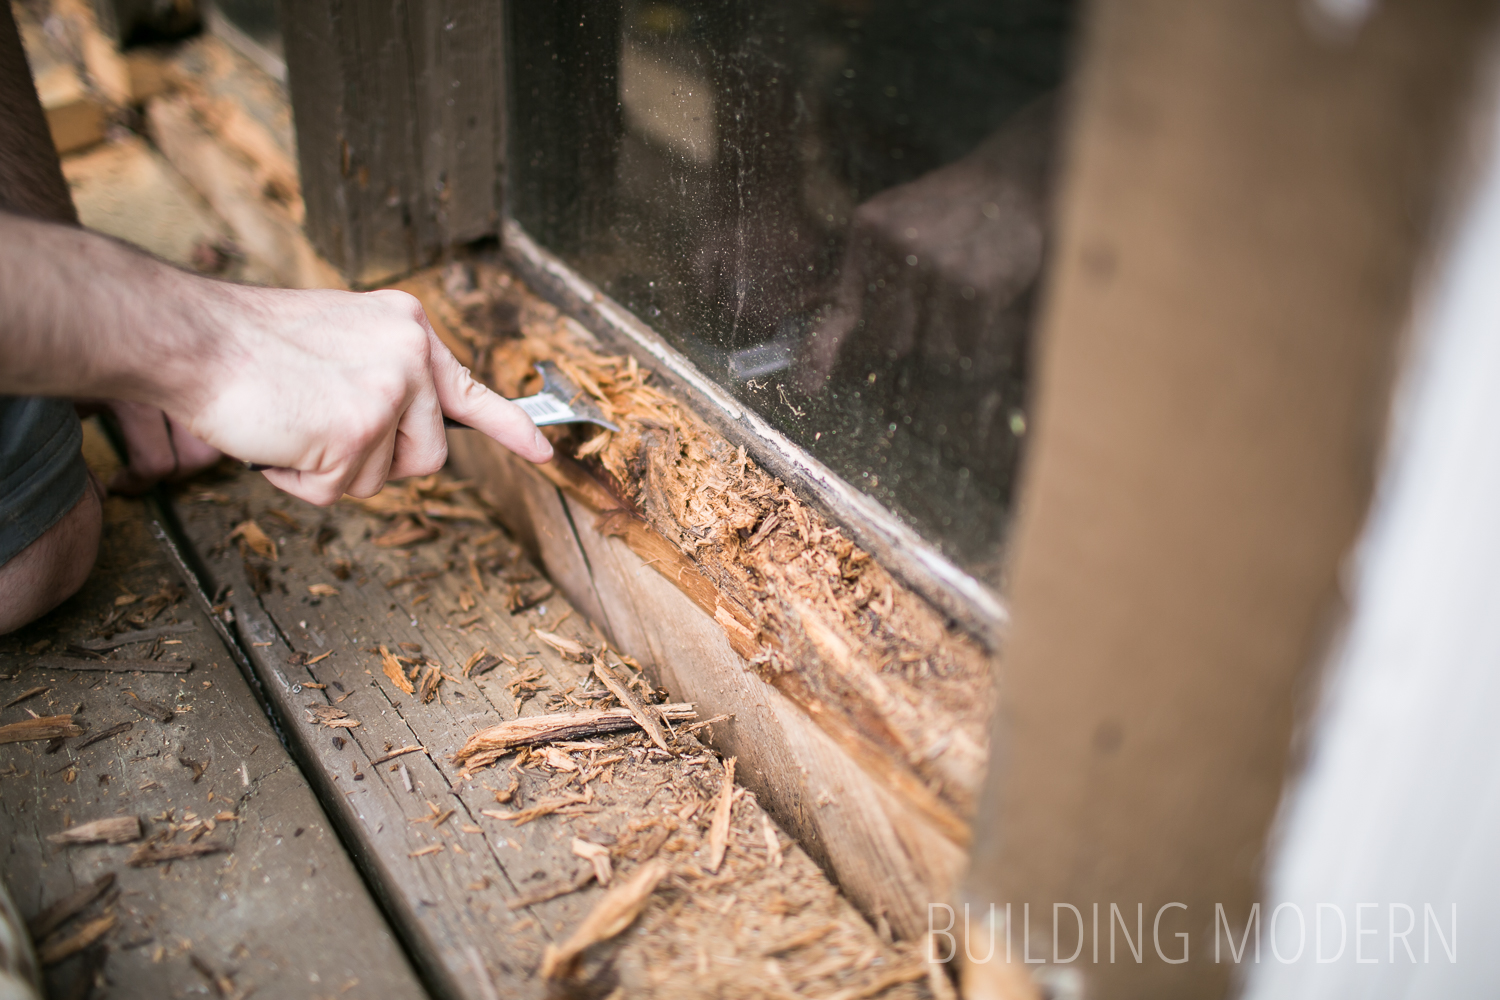
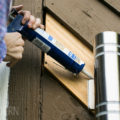
We had the glass guys scheduled for the next day, so the project needed to be finished by the next morning. Spencer started removing the old sill with the multi-tool.


Slowly whittling away at the area to get an idea of what we were dealing with:


The very bottom of the cedar beams were starting to be compromised.


A better looks at the undersides of the discarded material:

When you can’t find your chisels, get creative with a paint 5-in-1 tool!

Some off the nails we pulled out: pretty corroded by water:

The rot getting close to the glass unfortunately.
Even though they look like they are floating in mid-air, the beams are still supported on the other side of the glass.

Down to good wood directly under the glass. The plan is to simply replace the old rotten portion of the sill. This would have been a bit complicated for a full replacement: the entire interior portion of the sill is structural: the vertical beams sit on it on the inside of the house. I don’t believe the portion that we removed was structural as it was dangling in the air at the very edge of the wall. Our best bet is to keep the good portions and add a new exterior sill that will be properly pitched to shed water… that and a lot of caulk.

Since the glass is still in the way and these are not traditional operable windows, we couldn’t nail from above. (There was nothing to nail into.) It may not be the proper solution, but it is a work-around: we used a Kreg jig to mend the two pieces together.

Izumi is a good construction kitty.

We cut the new pressure treated board at the proper angle to shed water, supported the board with shims and glued & screwed it to the old cedar.

Adding additional wood glue:

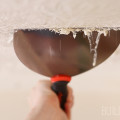
We then added exterior caulk to the seam and screw holes:

We will address the bottoms of the vertical posts at a later date… the next day was new glass installation!

I am not an expert and I am not saying that this is the perfect way to mend a rotted sill for a storefront window, but it is probably the best we could do given the situation. I am also definitely not a fan of relying on caulk as the only water barrier either. (However, this is how the entire window system is made to begin with: just framing, caulk, and glass). At least this is an area of the home that is easily accessible and we can keep an eye on the caulk to make sure it isn’t failing.
Short of removing the entire assembly and having to somehow support the roof – this is an exterior wall – I am not sure what else we could have done. Looking forward to the new glass and being able to finally see out of these giant windows!


The kitchen Floor is not level
Prior to purchasing our house, we could easily see with the naked eye that the floor in the foyer was not level…this was also the case for the area near/inside the pantry in the kitchen. In the foyer, the floor sloped down to the right toward the master bedroom wall. In the kitchen, it sloped down toward the foyer wall.
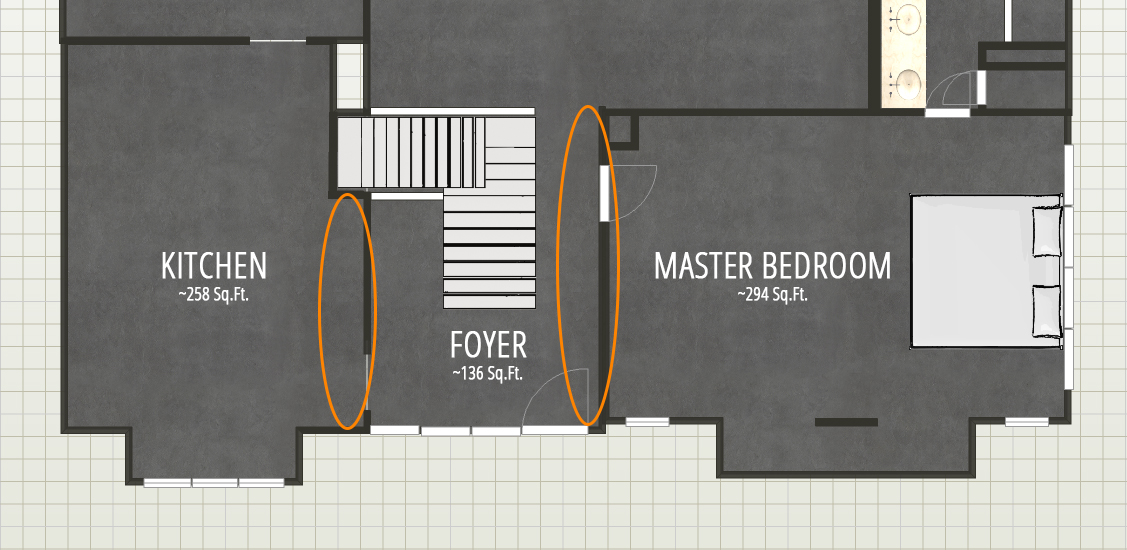
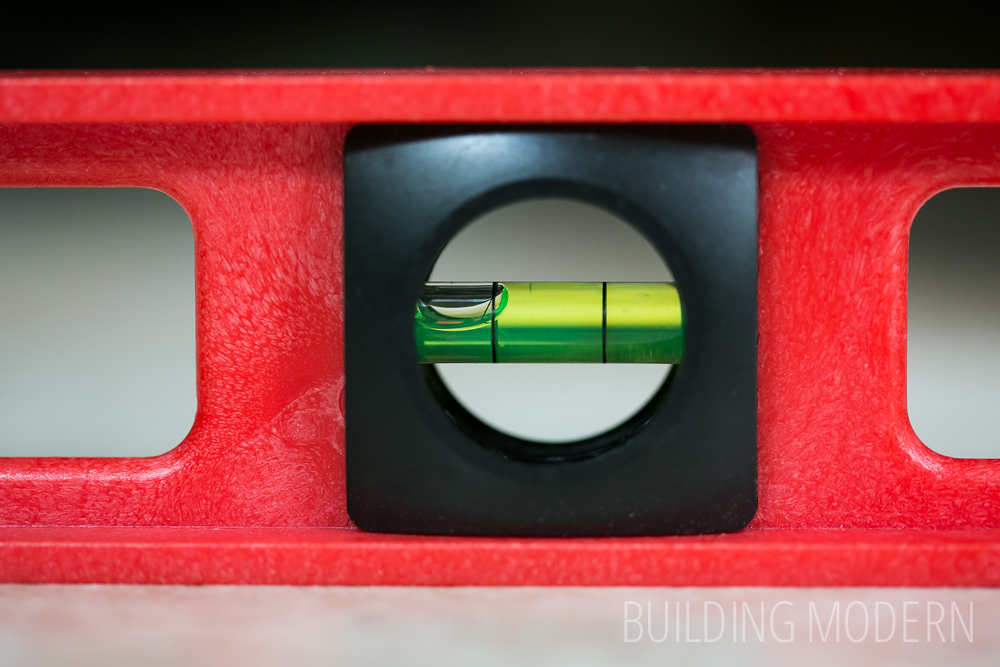
The slope in the floor over by the pantry – the level’s bubble maxed out to one side is probably not a good thing.
After we demolished the kitchen floor, we discovered that the area toward the center of the room was also not level. In this instance, the floor was not sloping or sagging… it was bowed up in the center.
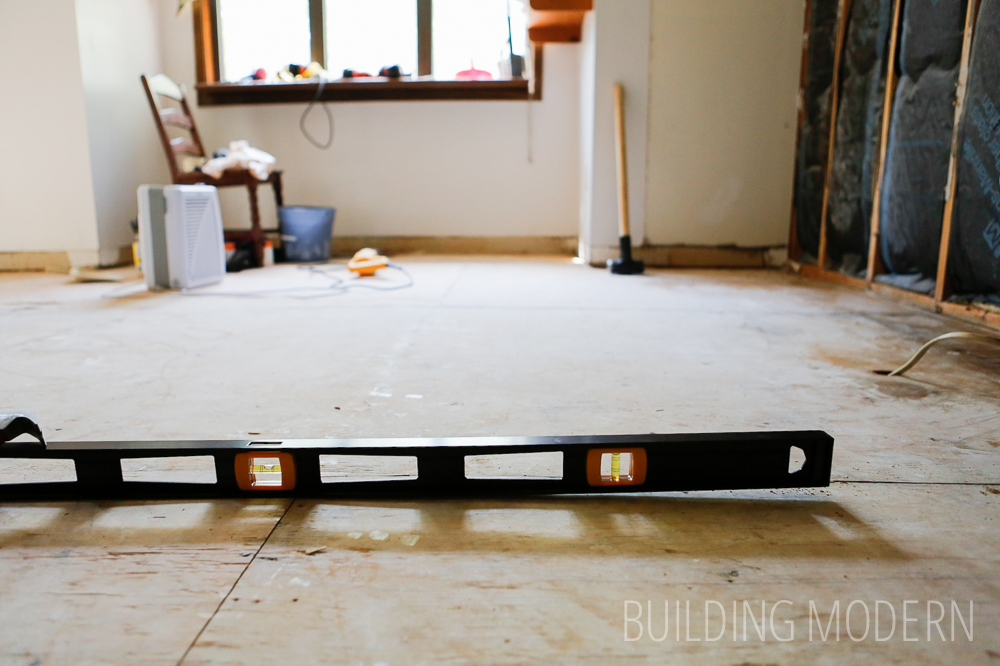
A high spot in the floor is a real problem: low joists you can jack up, but with high joists… there’s not much you can do.
We briefly looked into self-leveling-products, but quickly dismissed the idea. First off, we couldn’t find any information online about using a self-leveling-cement on a plywood subfloor. Every resource online was referring to leveling a concrete floor.
Here were our concerns:
•We were pretty sure that the product would seep into cracks and flow down into the basement without some sort of lining.
•We were also unsure about the added weight.
•We needed to be able to nail down real hardwood flooring, which you can’t do with concrete.
•We needed to maintain the current floor elevation to match up with the oak floor in the adjoining rooms.

So, self leveling cement was out. What did we decide to do? Hide the problem with the kitchen island.
Yep. The “easy” way out – our solution was to do nothing. The bow in the center of the room was contained to the exact area we were thinking of placing our island. Boom. Done. (Well, not quite, we knew we needed to address the sloping floor on the other side of the kitchen and in the foyer, but that’s a project for another day.)


- 1
- 2
- 3
- …
- 28
- Next Page »